My family loves these rolls. Though they have been absent from the array of Thanksgiving fodder in recent years, making way for Sweet Potato Pie and my brother's Brandied Sweet Potato puree, baked in a hollowed out Orange, we all still love and adore these rolls. So much so, that my Nephew use to ask for them for his birthday, and would sit in a corner and eat the whole batch... LOL
Personally, I am pretty happy with the fact that they no longer accompany Thanksgiving dinner. These rolls are just too delicious to be regulated to ONLY special occasions. :) I am now able to enjoy them all year long without any guilt. I am sure this will make my Nephew pretty happy as well.
Mom always made them with the "dough" setting on her bread machine. I, however, do not own a bread machine and therefore must assemble them via Kitchen Aid dough hook, or completely by hand. Either way, it takes about he same amount of time (though the bread machine is a little more hands off) for the assembly of the dough is fairly quick and simple. Most of the time is taken up by raising.
In the bread machine's dough setting there are 2 raising cycles, while the dough hook/by hand version only requires 1 raise. This is because you always dump everything together in the bread machine, turn it on, let it run and there is no "proofing" of the yeast. It kind of gets shocked into functioning, so it takes a little longer for it to reach it's full potential. When making these by hand, you always proof the yeast while you assemble the rest of the ingredients... Thus the yeast is awake and ready to consume sugars as soon as you add it to the flour.
The Bread machine takes about 1 1/2 hours to make dough... When I make this recipe by hand, it's actually about 15 minutes faster than the machine. :) I guess it's true that machinery is not all it's cracked up to be, but it sure can be convenient when you have a million other things to do.
 To make Dough:
1/2 cup mashed Gold Sweet Potato (usually sold as "Yams")
1/2 cup Whole Milk
1 large Egg
2 cups Bread Flour
1 cup AP Flour
1 1/2 tsp Kosher Salt
2 TB Brown Sugar
2 TB Unsalted Butter
1 Pkg Rapid Rise Yeast
To make rolls:
Olive Oil
3 TB Melted Butter
Before we can do anything, you need some sweet potato/yam mash. So grab a Sweet Potato (The ones that are golden on the inside, not the white fleshed ones)
 Poke the sweet potato all over with a fork. (Show no mercy!)
 Toss it into a 375 F (190C) degree oven for about 25 minutes (I build a small pan out of foil to keep it from weeping all over my oven)
 When the liquid from the sweet potato is beginning to "bead" around the holes, it's done. (It should be nice and soft)
 Let it cool for about 10 minutes, then peel the sweet potato (the skin should almost fall off)
 Mash liberally with a fork...
 OK, now we have a sweet potato puree, so ON WITH THE ROLLS!
Bread Machine directions - I am using an Oster machine...
Use the "Dough" setting.....
 Place Milk, Egg, and Sweet Potato puree into the machine.
 Add Bread and AP Flour along with the Salt, Brown Sugar and Butter, then sprinkle the yeast over the top.
 Push the Start button and wait until the machine is done (this machine takes 1 1/2 hours to make dough)
 Now you are ready to make rolls.... (Skip the next part and move down to "Make Rolls" Section)

By Hand Directions: (or by Kitchen Aid with a dough hook)
Warm the Milk to about 100 F (38 C) degrees.
 Sprinkle the Yeast over the Milk and allow it to proof.
 When the bubbles form (in about 10 minutes) the yeast is ready.
 While the yeast is "waking up", go ahead and whisk Bread Flour, AP Flour, Salt, and Sugar together in the bowl of your mixer.
 Once the yeast is ready, add it to the Flour mixture and stir to combine.
 Add the Sweet Potato puree and mix.
 Beat the Egg slightly to break up the yolk and white, then add this to the forming dough.
 Melt the Butter and pour that into the bowl as well.
 Stir everything together well....
Then, you can either kneed the dough with your dough hook for 10 minutes.

 Or knead it on the counter until it's smooth and elastic. (believe it or not, I prefer to knead it myself as it's a fairly soft dough)
 Place in an oiled bowl.
 Cover on the surface with plastic wrap and allow to rise in a warm place, until doubled in size (about 1 hour)

 Punch down the dough... Now you are ready to make rolls.

Make Rolls: (The rest of this will be the same, regardless of whether you use the bread machine or not)
Preheat your oven to 350 F (175 C) Degrees
Grab a fairly large baking dish or pan (I am using my CorningWare French White Roaster which is 10x14, but a 13x9 will work as well)
 Drizzle and rub the dish down with Olive oil.
 Divide the dough into 16 pieces.
 Flatten the pieces slightly then fold them over on themselves and pinch the bottom together where the edges meet.
 You should have a smooth, round dough ball.
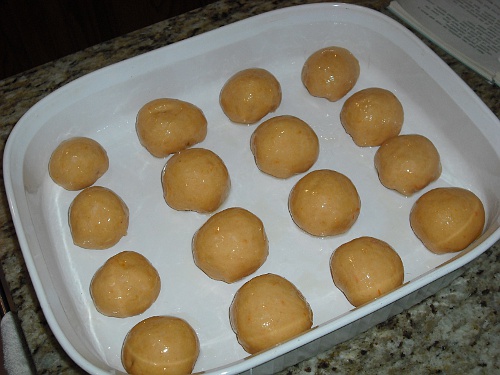
 Place in the oiled pan.
 Brush the rolls with more olive oil.
 Cover with Aluminum foil and let raise for 1 hour.

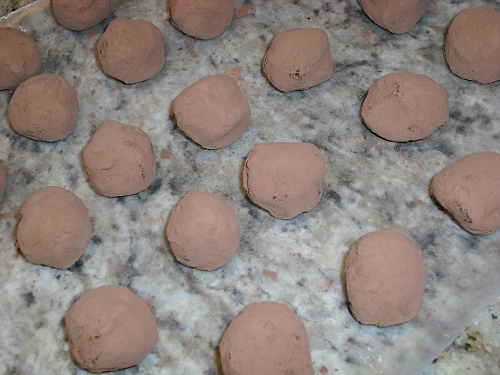
 Bake in your preheated oven for 20-25 minutes.
 Remove the rolls from the oven and immediately brush them with copious amounts of melted butter.
 Allow them to cool in the pan for about 5 minutes, then move them to a cooling rack or a basket.
 Rip one open and slather with additional butter.
 Consume with wild abandon.
Mangia!!
~~
Personally, I am pretty happy with the fact that they no longer accompany Thanksgiving dinner. These rolls are just too delicious to be regulated to ONLY special occasions. :) I am now able to enjoy them all year long without any guilt. I am sure this will make my Nephew pretty happy as well.
Mom always made them with the "dough" setting on her bread machine. I, however, do not own a bread machine and therefore must assemble them via Kitchen Aid dough hook, or completely by hand. Either way, it takes about he same amount of time (though the bread machine is a little more hands off) for the assembly of the dough is fairly quick and simple. Most of the time is taken up by raising.
In the bread machine's dough setting there are 2 raising cycles, while the dough hook/by hand version only requires 1 raise. This is because you always dump everything together in the bread machine, turn it on, let it run and there is no "proofing" of the yeast. It kind of gets shocked into functioning, so it takes a little longer for it to reach it's full potential. When making these by hand, you always proof the yeast while you assemble the rest of the ingredients... Thus the yeast is awake and ready to consume sugars as soon as you add it to the flour.
The Bread machine takes about 1 1/2 hours to make dough... When I make this recipe by hand, it's actually about 15 minutes faster than the machine. :) I guess it's true that machinery is not all it's cracked up to be, but it sure can be convenient when you have a million other things to do.
Sweet Potato (Yam) Rolls

1/2 cup mashed Gold Sweet Potato (usually sold as "Yams")
1/2 cup Whole Milk
1 large Egg
2 cups Bread Flour
1 cup AP Flour
1 1/2 tsp Kosher Salt
2 TB Brown Sugar
2 TB Unsalted Butter
1 Pkg Rapid Rise Yeast
To make rolls:
Olive Oil
3 TB Melted Butter
Before we can do anything, you need some sweet potato/yam mash. So grab a Sweet Potato (The ones that are golden on the inside, not the white fleshed ones)


Bread Machine directions - I am using an Oster machine...
Use the "Dough" setting.....


By Hand Directions: (or by Kitchen Aid with a dough hook)
Warm the Milk to about 100 F (38 C) degrees.


Then, you can either kneed the dough with your dough hook for 10 minutes.


Make Rolls: (The rest of this will be the same, regardless of whether you use the bread machine or not)
Preheat your oven to 350 F (175 C) Degrees
Grab a fairly large baking dish or pan (I am using my CorningWare French White Roaster which is 10x14, but a 13x9 will work as well)


Mangia!!
~~